
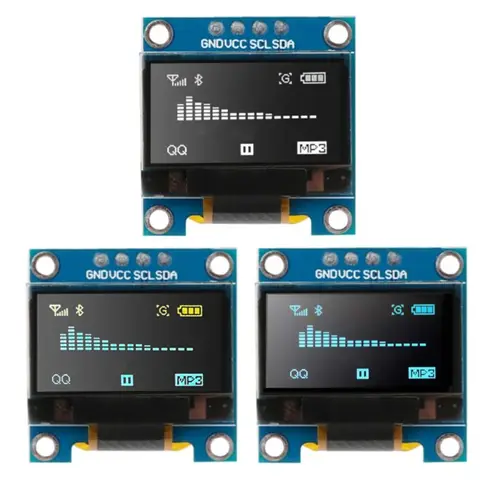







Results for ssd1306 i2c 128x64
SSD1306 I2C 128x64 OLED display modules are low-power, high-contrast, 128x64 pixel monochrome OLED displays that communicate via the I2C protocol, making them ideal for Arduino, Raspberry Pi, and STM32-based projects requiring compact, energy-efficient visual feedback.
The search intent behind ssd1306 i2c 128x64 is primarily technical—users are looking for a reliable, easy-to-integrate OLED display module for microcontroller-based projects. These modules are commonly used in DIY electronics, IoT devices, smart home displays, and wearable tech due to their clarity, low power consumption, and compatibility with popular development platforms. The term I2C indicates the user prioritizes simplicity in wiring and minimal GPIO usage, while 128x64 specifies the resolution they need for displaying text, icons, or simple graphics.
When selecting an SSD1306 I2C 128x64 module, consider the following key specifications:
- Operating Voltage: Most modules run at 3.3V or 5V. Ensure compatibility with your microcontroller (e.g., STM32G030J6M6 supports 2–3.6V, so a 3.3V module is recommended).
- I2C Address: Common addresses are 0x3C and 0x3D. Use a logic level shifter if connecting to a 5V microcontroller to avoid damage.
- Firmware & Libraries: Use well-maintained libraries like Adafruit SSD1306 or U8g2 for Arduino and ESP32. For STM32, consider HAL-based implementations with I2C DMA for better performance.
Avoid common pitfalls: using incorrect voltage levels, skipping pull-up resistors, or neglecting to initialize the display properly. For long-term reliability, choose modules with certified components (CE, RoHS) and stable soldering. The keyestudio I2C LCD 20X4 and WS2812b LED panels are unrelated but serve different purposes—stick to SSD1306 modules for OLED display needs.
The search intent behind ssd1306 i2c 128x64 is primarily technical—users are looking for a reliable, easy-to-integrate OLED display module for microcontroller-based projects. These modules are commonly used in DIY electronics, IoT devices, smart home displays, and wearable tech due to their clarity, low power consumption, and compatibility with popular development platforms. The term I2C indicates the user prioritizes simplicity in wiring and minimal GPIO usage, while 128x64 specifies the resolution they need for displaying text, icons, or simple graphics.
- SSD1306
- A monochrome OLED driver IC developed by Solomon Systech, designed to control small OLED displays with high contrast and fast response times. It supports multiple communication protocols, including I2C and SPI.
- I2C (Inter-Integrated Circuit)
- A two-wire serial communication protocol used for connecting low-speed peripherals to microcontrollers. It requires only two pins (SCL and SDA), making it ideal for space-constrained projects.
- 128x64 Resolution
- Refers to the pixel dimensions of the display—128 pixels wide and 64 pixels tall—providing enough space for displaying multiple lines of text, status indicators, or basic graphical elements.
When selecting an SSD1306 I2C 128x64 module, consider the following key specifications:
- Operating Voltage: Most modules run at 3.3V or 5V. Ensure compatibility with your microcontroller (e.g., STM32G030J6M6 supports 2–3.6V, so a 3.3V module is recommended).
- I2C Address: Common addresses are 0x3C and 0x3D. Use a logic level shifter if connecting to a 5V microcontroller to avoid damage.
- Firmware & Libraries: Use well-maintained libraries like Adafruit SSD1306 or U8g2 for Arduino and ESP32. For STM32, consider HAL-based implementations with I2C DMA for better performance.
- Verify your microcontroller’s I2C pins and enable the I2C peripheral in your code.
- Connect the SSD1306 module: SCL to SCL, SDA to SDA, VCC to 3.3V (or 5V if module supports it), and GND to ground.
- Use a 4.7kΩ pull-up resistor on both SCL and SDA lines if not already present on the module.
- Test communication using an I2C scanner sketch to confirm the device is detected at the correct address.
- Initialize the display with the appropriate library and start writing text or graphics.
Avoid common pitfalls: using incorrect voltage levels, skipping pull-up resistors, or neglecting to initialize the display properly. For long-term reliability, choose modules with certified components (CE, RoHS) and stable soldering. The keyestudio I2C LCD 20X4 and WS2812b LED panels are unrelated but serve different purposes—stick to SSD1306 modules for OLED display needs.